
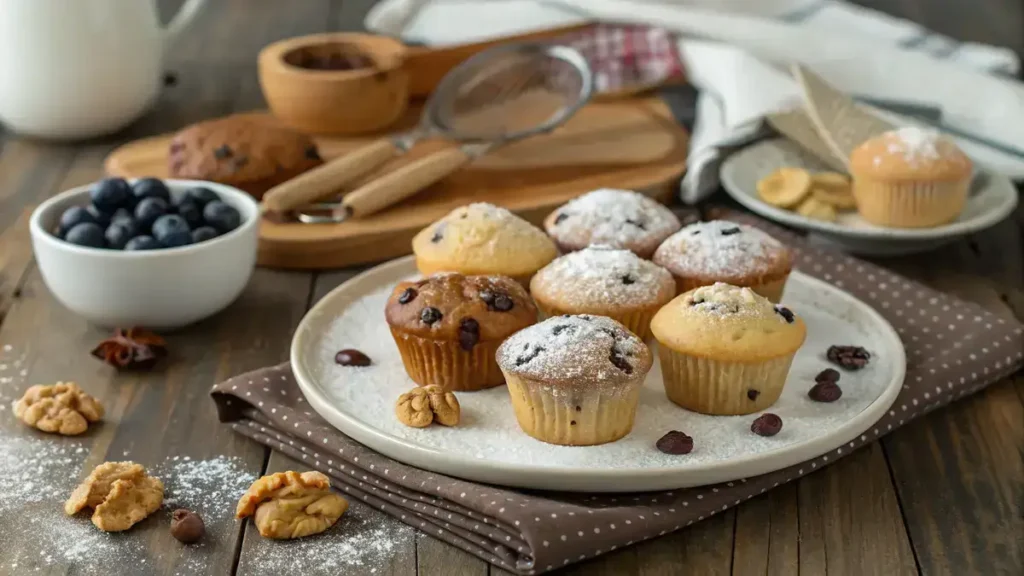
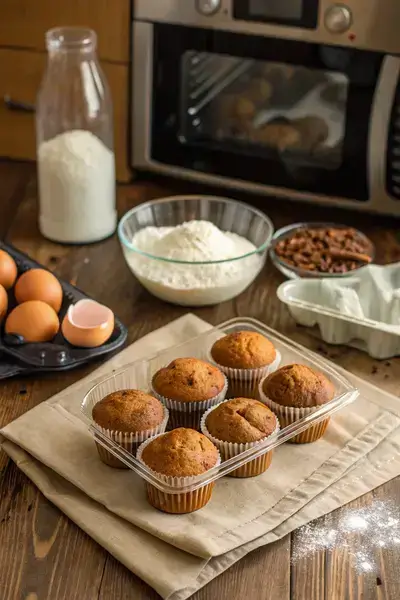
Are you ready to indulge in a delightful treat that’s perfect for any occasion? Mini muffins are not only bite-sized wonders but also incredibly versatile. Whether you’re looking for a quick breakfast option or a sweet snack for the kids, these soft and fluffy mini muffins will surely satisfy your cravings. Moreover, they are easy to make, allowing you to experiment with various flavors, such as chocolate chips or fresh fruits. So, gather your ingredients and let’s dive into the world of mini muffins, where every bite is a little piece of heaven!
According to the USDA, baked goods like muffins can be a good source of carbohydrates and fiber when made with whole grains. Learn more about choosing nutritious baking ingredients here: https://www.nutrition.gov/
____________________
Table of Contents
____________________
Key Benefits of Mini Muffins
Mini muffins are not just adorable; they come with a host of benefits that make them a favorite for many! Here’s why you should consider adding these delightful bite-sized treats to your baking repertoire:
- Perfect for Portion Control: Because they’re small, mini muffins are ideal for those who want to enjoy a sweet treat without overindulging. You can easily grab one or two without feeling guilty!
- Versatile Flavors: Mini muffins can be made in countless flavors, from classic blueberry to decadent chocolate chip. This versatility means there’s a mini muffin for everyone, making them a hit at family gatherings or playdates.
- Quick and Easy to Make: If you’re short on time, mini muffins are a fantastic option. They mix up quickly and bake faster than their larger counterparts, allowing you to whip up a batch in no time.
- Kid-Friendly: Kids love mini muffins! Their small size makes them easy for little hands to hold. Plus, you can sneak in healthy ingredients like fruits or nuts, making snack time both fun and nutritious.
- Great for Meal Prep: Mini muffins are perfect for meal prep. You can bake a batch over the weekend and have delicious snacks or breakfasts ready for the week ahead. Just store them in an airtight container, and you’re good to go!
In summary, mini muffins are not only delightful to eat but also incredibly practical. Whether you’re looking for a quick breakfast option, a tasty snack for the kids, or a versatile treat to impress guests, mini muffins have got you covered. So, why not give them a try? You’ll be glad you did!
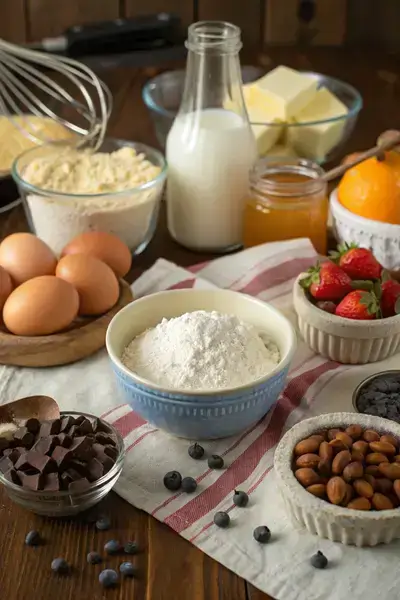
Ingredients for Soft & Fluffy Mini Muffins
Gathering the right ingredients is the first step to creating delightful mini muffins that are sure to please everyone. Below, you’ll find a list of essential ingredients along with some handy tips to help you choose the best options for your baking adventure.
- All-Purpose Flour: This is the backbone of your mini muffins. For a lighter texture, consider using cake flour instead. If you’re looking for a gluten-free option, almond or coconut flour can work well, but be sure to adjust the liquid accordingly. And if you are curious about how different flours impact baking? The University of Nebraska-Lincoln provides a helpful guide on alternative flours: https://food.unl.edu/
- Granulated Sugar: Regular sugar adds sweetness, but you can also use brown sugar for a deeper flavor. Alternatively, honey or maple syrup can be used, just remember to reduce the liquid in your recipe slightly.
- Baking Powder: This is crucial for that fluffy rise. Ensure it’s fresh for the best results. If you’re out, you can substitute with baking soda, but you’ll need an acid like yogurt or vinegar to activate it.
- Eggs: Eggs provide moisture and structure. If you’re vegan or allergic, try using flaxseed meal mixed with water or unsweetened applesauce as a substitute.
- Milk: Whole milk gives a rich flavor, but any milk—dairy or plant-based—will work. Almond milk or oat milk are great alternatives.
- Butter: Melted butter adds richness. For a healthier option, you can use coconut oil or applesauce, which will also keep your muffins moist.
- Vanilla Extract: This adds a lovely aroma and flavor. If you don’t have any, almond extract can be a delightful substitute.
- Chocolate Chips, Fruits, or Nuts: These are optional but highly recommended! Chocolate chips add sweetness, while fruits like blueberries or bananas bring natural flavor. Nuts add crunch, so feel free to mix and match based on your preferences.
By selecting quality ingredients, you’re setting the stage for mini muffins that are not only delicious but also a joy to make. Remember, the beauty of mini muffins lies in their versatility, so don’t hesitate to get creative with your ingredient choices!
How to Make Mini Muffins
Making mini muffins is a delightful experience that brings joy to both the baker and those who get to enjoy these bite-sized treats. Follow these simple steps to create soft and fluffy mini muffins that are perfect for breakfast, snack time, or any occasion!
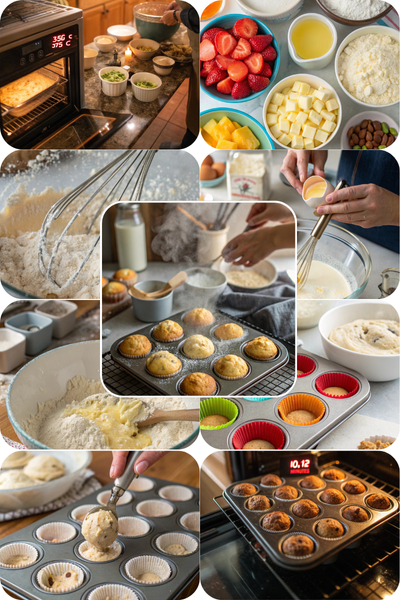
- Preheat Your Oven: Start by preheating your oven to 350°F (175°C). This step is crucial because a properly heated oven ensures even baking. While the oven warms up, you can prepare your muffin batter.
- Gather Your Ingredients: In a mixing bowl, combine the following ingredients:
- 1 ½ cups all-purpose flour
- ½ cup granulated sugar
- 2 teaspoons baking powder
- ½ teaspoon salt
- 1 large egg
- ½ cup milk
- ⅓ cup melted butter
- 1 teaspoon vanilla extract
- Optional: chocolate chips, fruits, or nuts for added flavor!
- Mix the Dry Ingredients: In a separate bowl, whisk together the flour, sugar, baking powder, and salt. This step helps to evenly distribute the leavening agent, ensuring your mini muffins rise beautifully.
- Combine Wet Ingredients: In another bowl, beat the egg, then add the milk, melted butter, and vanilla extract. Mix until well combined. It’s important to mix these ingredients thoroughly to achieve a smooth batter.
- Combine Wet and Dry Ingredients: Now, pour the wet mixture into the dry ingredients. Gently stir until just combined. Remember, overmixing can lead to dense muffins, so mix until you see no dry flour. If you’re adding chocolate chips or fruits, fold them in at this stage.
- Prepare the Muffin Tin: Line a mini muffin tin with paper liners or grease it lightly with cooking spray. This step prevents sticking and makes cleanup a breeze.
- Fill the Muffin Cups: Using a spoon or a small ice cream scoop, fill each muffin cup about two-thirds full. This allows room for the muffins to rise without overflowing.
- Bake: Place the muffin tin in the preheated oven and bake for 10-12 minutes. You’ll know they’re done when a toothpick inserted into the center comes out clean. Keep an eye on them, as baking times may vary slightly depending on your oven.
- Cool and Serve: Once baked, remove the mini muffins from the oven and let them cool in the tin for about 5 minutes. Then, transfer them to a wire rack to cool completely. Enjoy them warm or at room temperature!
By following these steps, you’ll create delicious mini muffins that are sure to be a hit with family and friends. Feel free to experiment with different flavors and ingredients to make them your own. Happy baking!
Pro Tips, Variations & Common Problems
Making mini muffins can be a delightful experience, but sometimes things don’t go as planned. Here are some expert tips to ensure your mini muffins turn out soft, fluffy, and absolutely delicious!
Pro Tips
- Don’t Overmix: When combining your ingredients, mix just until everything is incorporated. Overmixing can lead to tough muffins. Therefore, a few lumps in the batter are perfectly fine!
- Use Room Temperature Ingredients: For the best texture, ensure your eggs and milk are at room temperature. This helps create a smoother batter and contributes to fluffiness.
- Check Your Oven Temperature: Ovens can vary, so it’s wise to use an oven thermometer. If your oven runs hot, your mini muffins may overbake, resulting in dryness.
- Fill the Muffin Cups Properly: Fill each muffin cup about 2/3 full. This allows room for rising without overflowing, ensuring a perfect dome shape.
- Let Them Cool: After baking, allow your mini muffins to cool in the pan for a few minutes before transferring them to a wire rack. This helps maintain their moisture.
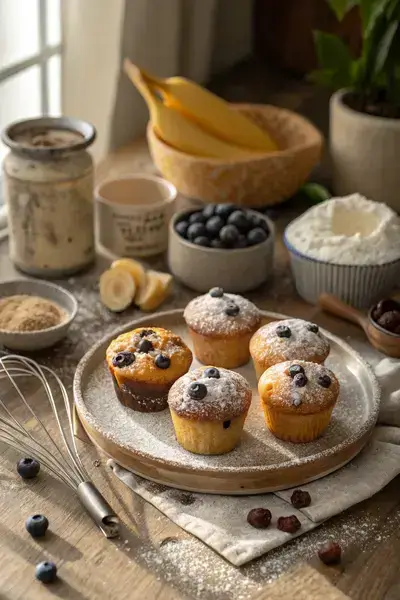
Creative Variations
- Fruit Additions: Consider adding fresh or frozen berries, diced apples, or bananas for a fruity twist. Just remember to adjust the sugar if your fruits are particularly sweet.
- Spice It Up: Add a teaspoon of cinnamon or nutmeg for a warm flavor. Alternatively, try a splash of vanilla or almond extract for a delightful aroma.
- Chocolate Lovers: Mix in chocolate chips or chunks for a decadent treat. You can also swirl in some Nutella for an extra indulgent muffin.
- Nutty Goodness: Incorporate chopped nuts like walnuts or pecans for added crunch and flavor. Just be sure to chop them finely to avoid overpowering the texture.
- Healthier Options: Substitute half of the all-purpose flour with whole wheat flour or use applesauce instead of oil for a lighter version.
Common Problems & Solutions
- Dry Muffins: If your mini muffins turn out dry, it could be due to overbaking. Always check for doneness a few minutes before the suggested baking time. Additionally, consider adding a bit more moisture, like yogurt or applesauce, to the batter.
- Flat Muffins: Flat mini muffins can result from expired baking powder. Always check the freshness of your leavening agents before baking. Moreover, ensure your batter is not too thin; it should be thick yet pourable.
- Sticking to the Pan: To prevent sticking, use muffin liners or grease the muffin tin well. If you find they still stick, try letting them cool longer in the pan before removing.
- Uneven Baking: If some muffins bake faster than others, rotate the muffin tin halfway through baking. This helps ensure even heat distribution.
- Flavor Lacking: If your mini muffins taste bland, consider adding a pinch of salt or increasing the vanilla extract. These small adjustments can enhance the overall flavor significantly.
With these tips and variations, you’ll be well on your way to mastering the art of mini muffins. Enjoy experimenting, and remember, baking is all about having fun in the kitchen!
Serving Suggestions for Mini Muffins
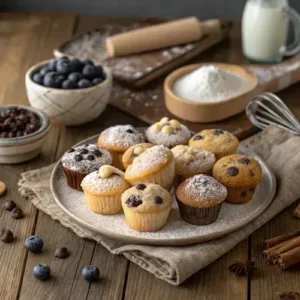
Mini muffins are not only delightful treats but also incredibly versatile. Whether you’re hosting a brunch, enjoying a cozy family breakfast, or simply looking for a snack, these bite-sized wonders can shine in various settings. Here are some creative serving ideas to elevate your mini muffins and impress your guests!
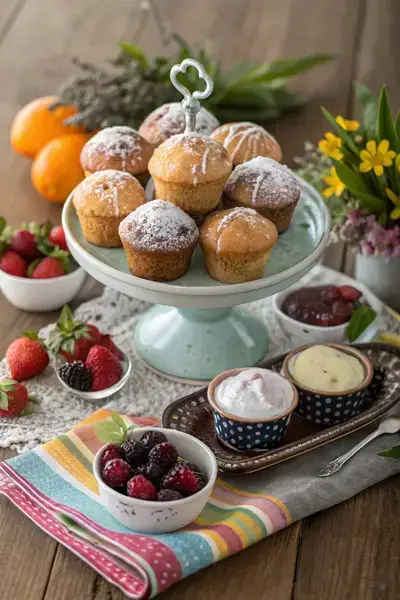
Plating Ideas: Start by arranging your mini muffins on a beautiful serving platter. You can use a tiered stand for an elegant touch, or simply place them in a rustic basket lined with a colorful napkin. Additionally, consider dusting them with powdered sugar or drizzling a light glaze over the top for a visually appealing finish.
Side Dish Pairings: Mini muffins pair wonderfully with a variety of accompaniments. For a breakfast spread, serve them alongside fresh fruit, yogurt, or granola. If you’re hosting a brunch, consider adding a savory element like cheese or charcuterie. Furthermore, a selection of jams and spreads can enhance the flavor experience, allowing guests to customize their bites.
Creative Serving Options: Depending on the occasion, you can present mini muffins in different styles:
- Casual Setting: For a relaxed gathering, place mini muffins in a basket with a fun cloth napkin. This creates a warm, inviting atmosphere.
- Elegant Occasion: Use a decorative cake stand and arrange the muffins in a circular pattern. Add some edible flowers or fresh herbs for a sophisticated touch.
- Family-Style Serving: Set up a muffin bar where guests can choose their favorites. Include labels for different flavors and toppings, making it interactive and fun!
Beverage Pairings: To complement your mini muffins, consider serving them with a selection of beverages. Coffee and tea are classic choices, but you could also offer fresh juices or smoothies for a refreshing twist. Moreover, a warm cup of cocoa can be a delightful pairing, especially with chocolate chip muffins!
In summary, with these serving suggestions, your mini muffins will not only taste amazing but also look stunning. So, whether it’s a cozy family breakfast or a festive gathering, these ideas will surely impress your guests!
Preserving and Reheating Mini Muffins
Storing and reheating mini muffins properly is essential to keep them soft, fluffy, and delicious. With the right techniques, you can enjoy these delightful treats even days after baking!
Storage Tips
To maintain the freshness of your mini muffins, it’s important to store them correctly. First, allow the muffins to cool completely before storing them. This step is crucial because it prevents condensation, which can lead to sogginess. Once cooled, place your mini muffins in an airtight container at room temperature. They will stay fresh for about 2 to 3 days.
If you want to keep them longer, consider freezing them. Wrap each muffin individually in plastic wrap, and then place them in a freezer-safe bag or container. This method helps to prevent freezer burn. When stored this way, mini muffins can last up to 3 months in the freezer. Just remember to label the bag with the date!
For food safety, always check for any signs of spoilage before consuming. If you notice any mold or an off smell, it’s best to discard the muffins. Additionally, avoid leaving them out at room temperature for more than 2 hours to prevent bacterial growth.
Reheating Methods
When it comes to reheating mini muffins, you want to ensure they remain soft and fluffy. Here are a few effective methods:
Oven: Preheat your oven to 350°F (175°C). Place the mini muffins on a baking sheet and cover them loosely with aluminum foil. This helps retain moisture. Heat for about 10 minutes, or until warmed through.
Microwave: For a quick option, use the microwave. Place a muffin on a microwave-safe plate and cover it with a damp paper towel. Heat for about 10-15 seconds. Check to see if it’s warm enough; if not, continue heating in 5-second intervals. This method adds moisture, preventing the muffin from drying out.
Air Fryer: If you have an air fryer, this is another great option. Preheat it to 300°F (150°C). Place the muffins in the basket and heat for about 5 minutes. This method gives them a nice, slightly crispy exterior while keeping the inside soft.
Regardless of the method you choose, always keep an eye on the muffins to avoid overcooking. Enjoy your mini muffins warm, and they’ll taste just as delightful as when they were freshly baked!
Conclusion
As we wrap up this delightful journey of making mini muffins, let’s take a moment to appreciate how simple and versatile this recipe truly is. By combining basic ingredients like flour, sugar, and eggs, you can create these soft and fluffy treats that are perfect for breakfast or snack time. Moreover, the beauty of mini muffins lies in their adaptability; whether you choose to add chocolate chips, fruits, or nuts, each batch can be uniquely yours. So, I encourage you to roll up your sleeves and give this easy recipe a try!
Once you’ve baked your mini muffins, I’d love to hear about your experience. Feel free to share your results or ask any questions you might have. Additionally, don’t hesitate to experiment with different flavors or pairings to make them even more special. Remember, cooking is all about creativity and fun, and these mini muffins are an excellent canvas for your culinary imagination. Happy baking!
mini muffins
Equipment
- 1 mini muffin tin For baking the muffins.
- 1 Mixing bowls For combining ingredients.
- 1 Whisk For mixing dry and wet ingredients.
- 1 spoon or ice cream scoop For filling muffin cups.
Ingredients
Dry Ingredients
- 1.5 cups all-purpose flour Can substitute with cake flour or gluten-free flour.
- 0.5 cups granulated sugar Can substitute with brown sugar, honey, or maple syrup.
- 2 teaspoons baking powder Ensure it’s fresh for best results.
- 0.5 teaspoon salt Enhances flavor.
Wet Ingredients
- 1 large egg Can substitute with flaxseed meal or applesauce.
- 0.5 cups milk Any type of milk works, including plant-based.
- 0.33 cups melted butter Can substitute with coconut oil or applesauce.
- 1 teaspoon vanilla extract Can substitute with almond extract.
- optional chocolate chips, fruits, or nuts For added flavor and texture.
Instructions
Preheat Your Oven
- Start by preheating your oven to 350°F (175°C). This step is crucial because a properly heated oven ensures even baking. While the oven warms up, you can prepare your muffin batter.
Gather Your Ingredients
- In a mixing bowl, combine the dry and wet ingredients as listed above.
Mix the Dry Ingredients
- In a separate bowl, whisk together the flour, sugar, baking powder, and salt.
Combine Wet Ingredients
- In another bowl, beat the egg, then add the milk, melted butter, and vanilla extract. Mix until well combined.
Combine Wet and Dry Ingredients
- Pour the wet mixture into the dry ingredients. Gently stir until just combined. If adding chocolate chips or fruits, fold them in at this stage.
Prepare the Muffin Tin
- Line a mini muffin tin with paper liners or grease it lightly with cooking spray.
Fill the Muffin Cups
- Fill each muffin cup about two-thirds full.
Bake
- Bake for 10-12 minutes, or until a toothpick comes out clean.
Cool and Serve
- Let them cool in the tin for 5 minutes, then transfer to a wire rack to cool completely.
Video
Notes
| Nutrient | Amount |
|---|---|
| Calories | 100 kcal |
| Carbohydrates | 12g |
| Protein | 2g |
| Fat | 4g |
| Saturated Fat | 1g |
| Sugar | 6g |
| Fiber | 0.5g |
| Sodium | 80mg |
____________________
You can visit our breakfast , lunch or dinner recipes from here :
Breakfast, Lunch, Dinner
FAQs
1. What makes mini muffins different from regular muffins?
Mini muffins are smaller, bite-sized versions of traditional muffins, making them perfect for snacking, portion control, and even lunchboxes. Due to their small size, they bake much faster—typically in 10-15 minutes compared to the 20-30 minutes required for regular muffins. Their size also makes them more versatile; you can experiment with a variety of flavors, mix-ins, and toppings without committing to a full-sized batch. They are especially great for serving at parties, brunches, or as a grab-and-go breakfast option.
2. How do I prevent my mini muffins from sticking to the pan?
Preventing mini muffins from sticking ensures they come out perfectly intact. Here are some effective methods:
Grease the pan properly: Use butter, oil, or non-stick cooking spray to coat each mini muffin cup thoroughly.
Use muffin liners: Paper or silicone liners help with easy removal and also make cleanup simpler.
Choose a non-stick pan: A high-quality non-stick mini muffin tin reduces the chances of sticking.
Cool before removing: Let the muffins rest for about 5 minutes after baking before attempting to remove them. This helps them firm up, preventing breakage.
Use a small offset spatula or butter knife: Gently loosen the edges if needed.
3. Can I substitute ingredients in mini muffin recipes?
Yes! Mini muffin recipes are quite adaptable, and you can modify them based on dietary needs or preferences:
Flour substitutions: Use whole wheat flour instead of all-purpose for added fiber, or almond flour for a low-carb alternative.
Sugar replacements: Swap white sugar for honey, maple syrup, or mashed bananas for natural sweetness. Keep in mind that liquid sweeteners may require slight adjustments in dry ingredients.
Dairy-free options: Use almond milk, oat milk, or coconut milk instead of regular milk.
Egg substitutes: If you’re out of eggs or need a vegan option, try using flaxseed meal (1 tablespoon flaxseed + 3 tablespoons water per egg) or unsweetened applesauce.
Whenever you substitute, be aware that the texture and baking time might change slightly. Experiment in small batches to find the best balance!
4. How do I know when my mini muffins are done baking?
Since mini muffins bake quickly, it’s important to check for doneness to avoid overbaking. Here’s how:
Toothpick test: Insert a toothpick into the center of a muffin—if it comes out clean or with a few dry crumbs, they’re ready.
Golden brown tops: The tops should be lightly golden and slightly firm to the touch.
Spring-back test: Gently press the top of a muffin; if it springs back instead of sinking, it’s done!
Aromatic clues: A fully baked batch of mini muffins will have a pleasant, baked aroma—if they still smell like raw batter, they likely need a few more minutes.
Keep an eye on them as baking times can vary depending on your oven, altitude, and the type of ingredients used.
5. What’s the best way to store mini muffins?
Proper storage ensures that mini muffins stay fresh and delicious for as long as possible. Here’s what you can do:
At room temperature: Store mini muffins in an airtight container lined with a paper towel to absorb excess moisture. They’ll stay fresh for about 3 days.
Refrigeration: While not necessary, you can refrigerate them for up to a week if your home is warm. Just warm them slightly before eating to restore softness.
Freezing for long-term storage:
Let the muffins cool completely.
Arrange them in a single layer on a baking sheet and freeze for about an hour.
Transfer frozen muffins to a freezer-safe bag or container.
Label with the date; they’ll stay good for up to 3 months.
To reheat, microwave for 10-15 seconds or warm in an oven at 300°F (150°C) for a few minutes.
Freezing is a great way to always have a quick, homemade snack or breakfast on hand!