
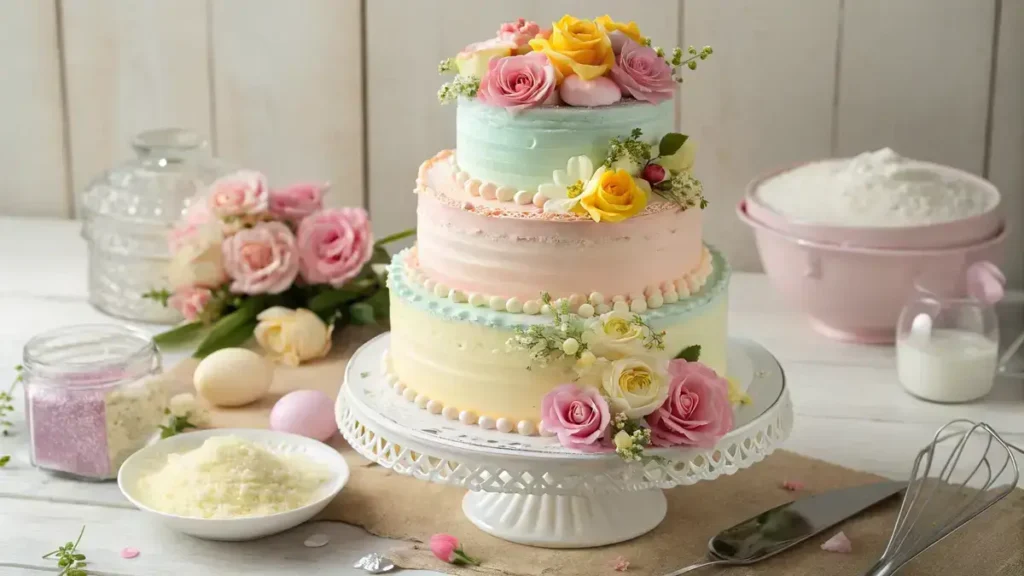
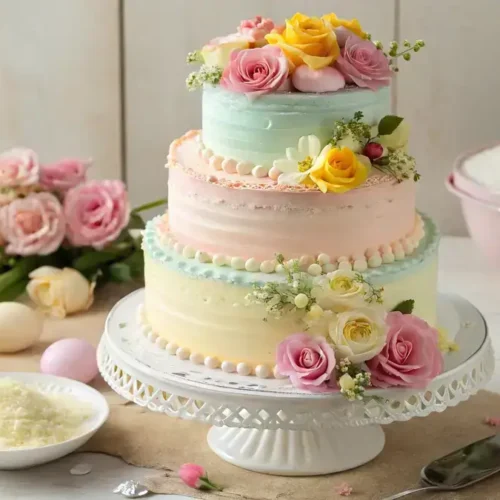
Tiered Cake invites you into a whimsical kitchen adventure as ribbons of vanilla sponge ascend into cloudlike layers. Each tier hides pockets of tangy raspberry jam and silky lemon curd, while a creamy buttercream flavored with zesty orange replaces any need for spirits. The story begins as gently whipped eggs and sugar transform under the hum of your mixer, folding in tender flour and creamy milk for a melt-in-your-mouth crumb. With edible flowers cascading atop each height and pastel swirls that dance along the edges, this showstopper will be the sweet centerpiece of every gathering. Baking magic never tasted so playful and beautiful.
Table of Contents
Why You’ll Love This Tiered Cake
- Impressive centerpiece for any celebration.
- Customizable flavors and designs to match your theme.
- Perfect for sharing and creating lasting memories.
- Layers of moist cake and rich frosting in every bite.
Tiered Cake
Equipment
- 3 Cake pans of different sizes Greased and floured for easy removal
- 1 Mixing bowls For mixing ingredients
- 1 Whisk For mixing dry ingredients
- 1 Spatula For leveling and spreading frosting
- 1 Cooling rack For cooling the cakes
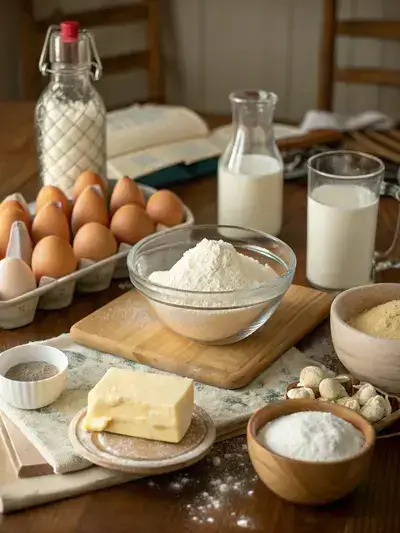
Ingredients
Dry Ingredients
- 3 cups all-purpose flour for a sturdy cake base
- 2.5 cups granulated sugar adds sweetness
- 2.5 teaspoons baking powder for leavening
- 1 teaspoon salt enhances flavor
Wet Ingredients
- 1 cup unsalted butter for richness and flavor
- 4 large eggs helps bind the ingredients
- 1 cup whole milk keeps the cake moist
- 2 teaspoons vanilla extract for a lovely aroma
Buttercream Frosting
- 4 cups powdered sugar for the buttercream frosting
- 1 cup unsalted butter base for the buttercream
- 2-4 tablespoons heavy cream adjusts the frosting consistency
- 1 teaspoon vanilla for the frosting
Instructions
Preparation
- Preheat your oven to 350°F (175°C). This is the perfect temperature for baking your cakes to fluffy perfection!
- Grease and flour three cake pans of different sizes. This will help your cakes slide out easily once they’re baked.
- In a bowl, whisk together flour, baking powder, and salt. This ensures even distribution of the leavening agents.
- In another bowl, cream butter and sugar until light and fluffy. This step adds air to your batter, making it rise beautifully.
- Add eggs one at a time, mixing well after each addition. Then stir in the vanilla for that lovely flavor.
- Alternately add the dry mix and milk to the butter mixture, beginning and ending with the dry mix. This keeps the batter smooth and well combined.
- Divide the batter among the prepared pans and bake for 25-30 minutes. Check with a toothpick; it should come out clean!
- Once baked, cool the cakes completely in the pans before transferring them to a wire rack.
- Make your buttercream by beating butter until creamy. Gradually add powdered sugar, vanilla, and cream until smooth and fluffy.
- Level the tops of your cakes with a knife. Stack them with buttercream between each layer, then apply a crumb coat to seal in the crumbs.
- Chill the cake to set the crumb coat. Then, apply a final coat of frosting and decorate as desired. Let your creativity shine!
Notes
| Nutrient | Amount per Serving |
|---|---|
| Calories | 350 |
| Fat | 15g |
| Protein | 4g |
| Carbs | 50g |
Ingredients
Here’s what you’ll need to create a delicious tiered cake!
- 3 cups all-purpose flour – for a sturdy cake base
- 2 ½ cups granulated sugar – adds sweetness
- 1 cup unsalted butter – for richness and flavor
- 4 large eggs – helps bind the ingredients
- 1 cup whole milk – keeps the cake moist
- 2 ½ teaspoons baking powder – for leavening
- 1 teaspoon salt – enhances flavor
- 2 teaspoons vanilla extract – for a lovely aroma
- 4 cups powdered sugar – for the buttercream frosting
- 1 cup unsalted butter – base for the buttercream
- 2-4 tablespoons heavy cream – adjusts the frosting consistency
- 1 teaspoon vanilla – for the frosting
How to Make a Stunning Tiered Cake
Making a tiered cake is a delightful adventure! With a preparation time of about 30 minutes, cooking time of 25-30 minutes, and some extra chilling time for the frosting, you’ll create a stunning centerpiece for any occasion.
Step 1: Preheat the Oven
Preheat your oven to 350°F (175°C). This is the perfect temperature for baking your cakes to fluffy perfection!
Step 2: Prepare the Pans
Grease and flour three cake pans of different sizes. This will help your cakes slide out easily once they’re baked.
Step 3: Mix Dry Ingredients
In a bowl, whisk together flour, baking powder, and salt. This ensures even distribution of the leavening agents.
Step 4: Cream Butter and Sugar
In another bowl, cream butter and sugar until light and fluffy. This step adds air to your batter, making it rise beautifully.
Step 5: Add Eggs and Vanilla
Add eggs one at a time, mixing well after each addition. Then stir in the vanilla for that lovely flavor.
Step 6: Combine Dry Ingredients and Milk
Alternately add the dry mix and milk to the butter mixture, beginning and ending with the dry mix. This keeps the batter smooth and well combined.
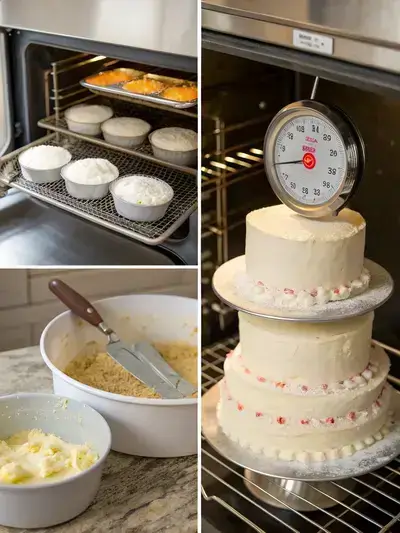
Step 7: Bake the Cakes
Divide the batter among the prepared pans and bake for 25-30 minutes. Check with a toothpick; it should come out clean!
Step 8: Cool the Cakes
Once baked, cool the cakes completely in the pans before transferring them to a wire rack.
Step 9: Prepare the Buttercream
Make your buttercream by beating butter until creamy. Gradually add powdered sugar, vanilla, and cream until smooth and fluffy.
Step 10: Level and Stack the Cakes
Level the tops of your cakes with a knife. Stack them with buttercream between each layer, then apply a crumb coat to seal in the crumbs.
Step 11: Chill and Frost
Chill the cake to set the crumb coat. Then, apply a final coat of frosting and decorate as desired. Let your creativity shine!
Recipe Snapshot
| Feature | Details |
|---|---|
| Category | Dessert |
| Cuisine | American |
| Prep Time | 30 minutes |
| Cook Time | 30 minutes |
| Extra Time | 30 minutes (Chilling time for frosting) |
| Total Time | 90 minutes |
| Dietary | Vegetarian |
| Serves | 12 |
| Best Served | At celebrations and special occasions! |
Pro Tips for Making Tiered Cake
- Chill your cake layers before stacking for easier handling.
- Use a sturdy cake board for support between tiers.
- Level your cake layers with a serrated knife for a professional look.
- Consider using dowels for stability in taller cakes.
- Keep your frosting at room temperature for easy spreading.
How to Serve this Tiered Cake
- Slice into generous portions for a delightful dessert.
- Pair with fresh berries for a burst of flavor.
- Serve with a scoop of vanilla ice cream for extra indulgence.
- Drizzle with chocolate or caramel sauce for a sweet touch.
- Accompany with a cup of herbal tea for a cozy afternoon treat.
- Top with whipped cream and mint leaves for a refreshing finish.
Make Ahead and Storage
You can make this cake ahead and store it easily:
Storing Tiered Cake Leftovers
- Wrap each layer in plastic wrap.
- Place in an airtight container.
- Store in the refrigerator for up to 3 days.
- Keep frosting separate if possible.
Freezing Tiered Cake
- Wrap layers tightly in plastic wrap.
- Use aluminum foil for extra protection.
- Label with the date and type of cake.
- Freeze for up to 3 months for best quality.
Reheating Tiered Cake
- Thaw in the refrigerator overnight.
- Let sit at room temperature for 30 minutes before serving.
- For warm cake, use a microwave in short bursts.
- Cover with a damp paper towel to retain moisture.
Explore more easy breakfast recipes, quick lunch ideas, cozy dinner meals, tasty , and delightful dessert.
FAQs
Here’s a helpful FAQ about this recipe:
1. Does Walmart make 3 tier cakes?
Yes, Walmart does offer 3 tier cakes! They have a variety of designs and flavors to choose from, making it easy to find the perfect cake for your special occasion. You can customize your cake to fit your theme, and their bakery staff can help you with any specific requests you may have.
2. What is the two cakes rule?
The two cakes rule is a guideline often used for tiered cakes, suggesting that for every two tiers of cake, you should have an additional cake to serve your guests. This ensures that everyone gets a slice, especially if the tiers are small or if you have a large guest list. It’s a great way to ensure no one goes home without a delicious piece of cake!
3. Why are tiered cakes expensive?
Tiered cakes can be more expensive due to the intricate design, the time it takes to bake and decorate, and the quality of ingredients used. Each tier often requires careful construction and support to ensure stability, which adds to the labor involved. Additionally, custom designs and flavors can increase the cost, but the result is a stunning centerpiece for your celebration!
Final Thoughts
Making a tiered cake is not just about baking; it’s about creating memories! So grab your favorite flavors, let your creativity flow, and enjoy the process. Each layer is a chance to express yourself, and the joy of sharing it with loved ones is simply unbeatable. Happy baking!